How To Care For Spring Flowering Bulbs Planted In Fall: Imagine a garden bursting with vibrant blooms, a symphony of colors that herald the arrival of spring. To achieve this picturesque vision, careful planning and consistent care are essential, particularly for bulbs planted in the fall.
These underground treasures require specific conditions to thrive, ensuring a spectacular display of flowers come springtime. This guide delves into the essential steps to nurture your bulbs, from selecting the right varieties to protecting them from pests and diseases, ensuring a bountiful bloom year after year.
Spring-flowering bulbs, like tulips, daffodils, and hyacinths, are a delightful addition to any garden. They add a splash of color and fragrance, welcoming the warmer months with their cheerful presence. However, their success depends on proper planting and care during the fall, a crucial period for their development.
By understanding the specific needs of these bulbs, gardeners can cultivate a vibrant and flourishing garden that will be the envy of the neighborhood.
Choosing the Right Bulbs: How To Care For Spring Flowering Bulbs Planted In Fall

Selecting the right bulbs for your garden is crucial for successful spring blooms. Consider your climate, soil conditions, and desired bloom time when making your choices. Different bulbs have varying cold hardiness and prefer specific soil types for optimal growth.
Choosing Bulbs Suitable for Your Climate and Soil Conditions
The success of your spring-flowering bulbs depends on selecting varieties that thrive in your specific climate and soil conditions. Bulbs require different levels of cold exposure during winter to trigger flowering in spring. For example, tulips are generally cold-hardy, while some lilies require warmer temperatures.Soil type also plays a significant role.
Bulbs prefer well-drained soil that allows for proper aeration and prevents root rot. If your soil is heavy clay, amending it with compost or sand can improve drainage. Conversely, if your soil is sandy, adding organic matter like peat moss can improve water retention.
Popular Spring-Flowering Bulbs and Their Bloom Times
- Tulips:Bloom in early to late spring, depending on the variety. Plant tulips 6-8 inches deep. Popular varieties include ‘Queen of Night’ (purple), ‘Apricot Beauty’ (orange), and ‘White Parrot’ (white).
- Daffodils:Bloom in early to mid-spring. Plant daffodils 6-8 inches deep. Popular varieties include ‘King Alfred’ (yellow), ‘Ice Follies’ (white), and ‘Carlton’ (yellow with a white trumpet).
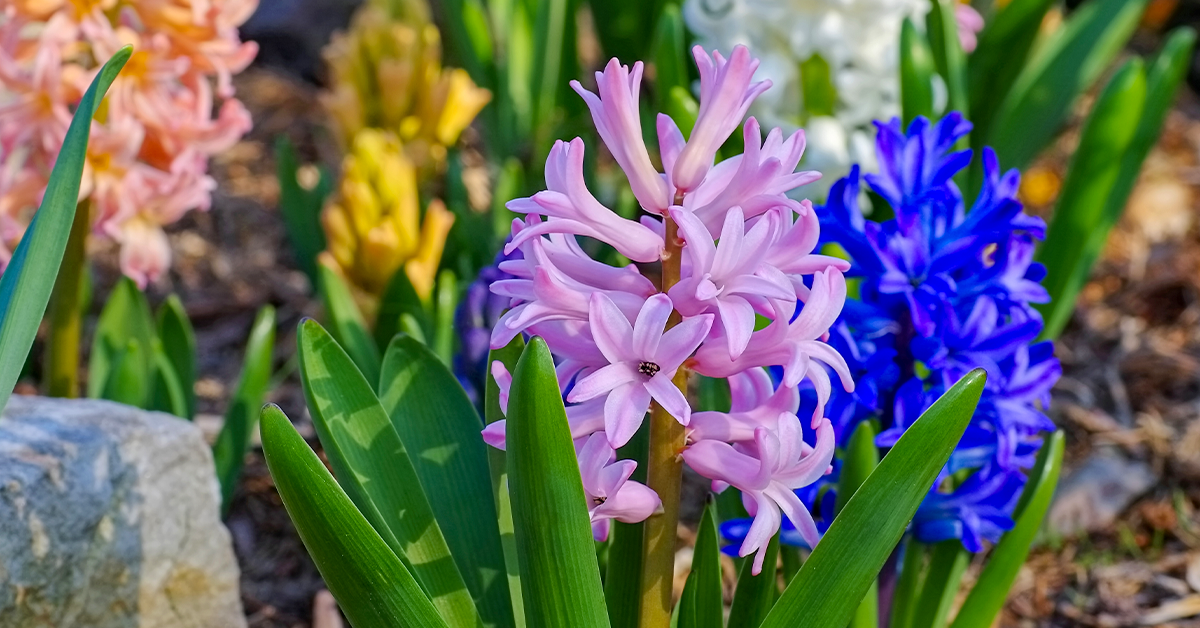
- Hyacinths:Bloom in early to mid-spring. Plant hyacinths 6-8 inches deep. Popular varieties include ‘Blue Jacket’ (blue), ‘Pink Pearl’ (pink), and ‘White Pearl’ (white).
- Allium:Bloom in mid to late spring. Plant alliums 4-6 inches deep. Popular varieties include ‘Purple Sensation’ (purple), ‘Globemaster’ (purple), and ‘Mount Everest’ (white).
- Crocus:Bloom in early spring. Plant crocuses 3-4 inches deep. Popular varieties include ‘Jeanne d’Arc’ (white), ‘Blue Pearl’ (blue), and ‘Cream Beauty’ (cream).
Choosing Healthy Bulbs
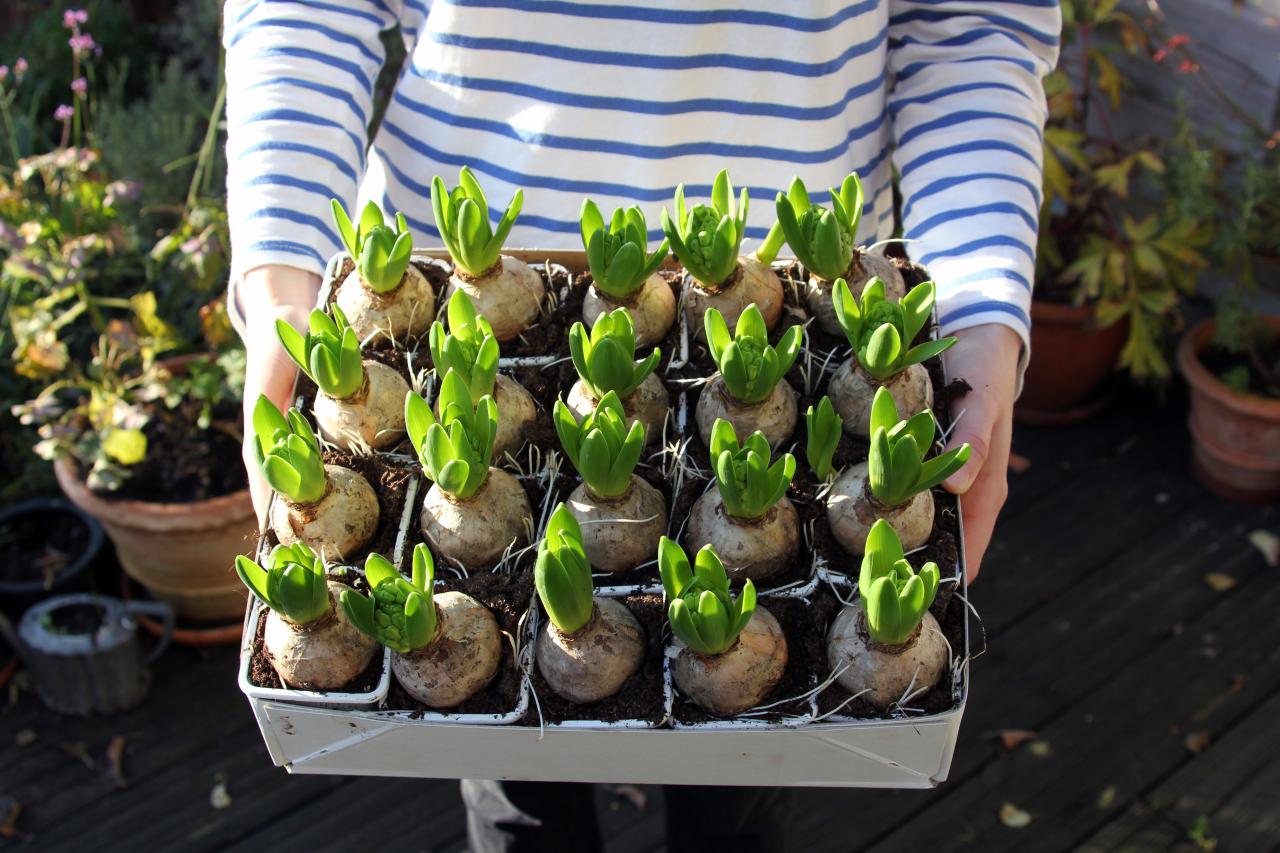
When selecting bulbs, choose those that are firm, plump, and free of damage or disease. Avoid bulbs that are soft, shriveled, or have any signs of mold or rot.
Preparing the Planting Site
Once you’ve chosen your bulbs, it’s time to prepare the planting site. This involves ensuring the soil is suitable for bulb growth. The right soil conditions will encourage healthy roots, promote strong growth, and help prevent disease.
Soil Requirements
Spring-flowering bulbs thrive in well-drained, fertile soil. They need soil that allows water to pass through easily, preventing the bulbs from rotting. The ideal pH for most bulbs is slightly acidic to neutral, ranging from 6.0 to 7.0. However, some bulbs, like tulips, prefer slightly alkaline soil (pH 7.0 to 7.5).
Soil Amendment
If your soil is heavy clay or poorly drained, you can improve it by adding amendments. These amendments can help improve drainage, aeration, and nutrient content.
- Compost: Compost is an excellent soil amendment that improves soil structure, adds nutrients, and enhances water retention.
- Peat Moss: Peat moss can help lighten heavy clay soils, improve drainage, and increase acidity. However, it’s essential to consider the environmental impact of peat moss extraction.
- Vermicast: Vermicast is a natural fertilizer derived from worm castings. It improves soil structure, adds nutrients, and promotes healthy plant growth.
Preparing the Planting Bed
Once you’ve amended the soil, you need to prepare the planting bed. This involves digging, loosening the soil, and removing any weeds.
- Digging: Dig a bed about 8-12 inches deep. The depth will depend on the type of bulb you’re planting. For larger bulbs like tulips and daffodils, a deeper bed is recommended.
- Loosening the Soil: After digging, use a garden fork or tiller to loosen the soil. This allows for better root development and drainage.
- Removing Weeds: Remove any weeds or existing plants from the planting bed. This will prevent competition for nutrients and water.
Planting the Bulbs
Planting depth is crucial for the successful growth and blooming of spring-flowering bulbs. The general rule of thumb is to plant bulbs at a depth that is two to three times the height of the bulb. However, different types of bulbs have varying planting depths, and understanding these variations is essential for optimal growth.
Planting Depth for Different Bulb Types
The planting depth for different bulb types is based on the size of the bulb and the type of plant.
- Small Bulbs:These include bulbs like crocuses, grape hyacinths, and snowdrops. They are typically planted at a depth of 2-3 inches.
- Medium Bulbs:These include bulbs like tulips, daffodils, and hyacinths. They are typically planted at a depth of 4-6 inches.
- Large Bulbs:These include bulbs like lilies and alliums. They are typically planted at a depth of 6-8 inches.
Planting Schedule for Different Bulb Types
The best time to plant spring-flowering bulbs is in the fall, before the ground freezes. However, the specific planting time will vary depending on the type of bulb and the climate.
- Early Bloomers:These include bulbs like crocuses, snowdrops, and grape hyacinths. They can be planted as early as September in most climates.
- Mid-Bloomers:These include bulbs like daffodils, tulips, and hyacinths. They can be planted in October or early November.
- Late Bloomers:These include bulbs like lilies and alliums. They can be planted in November or December, depending on the climate.
Planting Bulbs Correctly
Planting bulbs correctly ensures they grow and bloom properly. Follow these steps for successful planting:
- Prepare the Planting Hole:Dig a hole that is twice as wide as the bulb and as deep as the recommended planting depth.
- Place the Bulb:Place the bulb in the hole with the pointed end facing upwards. This is the growing point of the bulb.
- Backfill the Hole:Cover the bulb with soil, gently firming it around the bulb to ensure good contact.
- Water Thoroughly:Water the planting area thoroughly to settle the soil and encourage root growth.
Watering and Feeding
Proper watering and feeding are crucial for the health and blooming of spring-flowering bulbs. These practices ensure that the bulbs have the necessary resources to develop strong roots, foliage, and ultimately, beautiful flowers.
Watering Bulbs
Watering bulbs regularly, especially during the first few weeks after planting, is essential for establishing a strong root system. This initial period is critical for the bulbs to acclimate to their new environment and begin growing.
Properly caring for spring flowering bulbs planted in fall involves providing the right soil conditions, adequate watering, and ensuring they receive enough sunlight. To further maximize the enjoyment of your spring blooms, you can explore strategies for extending their display time, such as How To Extend The Bloom Time Of Spring Bulbs Planted In Fall.
By following these simple steps, you can ensure your spring bulbs thrive and reward you with a vibrant and long-lasting display of color.
- Water deeply and thoroughly, ensuring the soil is moist but not soggy.
- During dry spells, provide supplemental watering to maintain soil moisture.
- As the bulbs begin to emerge in spring, reduce watering frequency as the soil retains moisture better with the presence of foliage.
Fertilizing Bulbs
Fertilizing bulbs in the spring helps promote healthy growth and abundant blooms.
- Apply a balanced fertilizer, such as a 10-10-10 formula, in early spring, just as the shoots emerge.
- Avoid applying fertilizer directly to the bulbs, as this can burn them. Instead, sprinkle the fertilizer around the base of the plants.
- Follow the instructions on the fertilizer packaging for the correct application rate.
Protecting Bulbs from Pests and Diseases
While spring-flowering bulbs are generally hardy, they can be susceptible to pests and diseases that can damage or even kill them. Recognizing the signs of these issues and taking preventive measures can help keep your bulbs healthy and thriving.
Common Pests and Diseases
Understanding the common pests and diseases that can affect spring-flowering bulbs is essential for preventing and treating them effectively.
- Bulb Flies:These flies lay eggs in the soil near bulbs, and their larvae feed on the bulbs, causing them to rot. Signs of bulb fly infestation include wilting foliage and yellowing leaves.
- Nematodes:These microscopic worms can infest bulbs, causing them to become stunted and discolored. The affected bulbs may also have holes or tunnels.
- Bulb Mites:These tiny mites can damage bulbs by feeding on their scales, causing them to become dry and brittle. The affected bulbs may also show signs of discoloration or mold.
- Gray Mold (Botrytis):This fungal disease can affect bulbs in storage or in the ground. Signs of gray mold include gray or brown spots on the bulbs, as well as a fuzzy gray mold growth.
- Penicillium Rot:This fungal disease can also affect bulbs in storage or in the ground. Signs of penicillium rot include a white or greenish mold growth on the bulbs.
Preventing Pests and Diseases
Prevention is key to protecting your bulbs from pests and diseases. Implementing good sanitation practices and using organic pest control methods can significantly reduce the risk of infestations.
- Choose disease-free bulbs:Purchase bulbs from reputable sources and inspect them carefully for any signs of damage or disease before planting.
- Rotate crops:Rotating the location of your bulbs each year can help to break the life cycle of pests and diseases.
- Remove infected bulbs:If you find any bulbs that are infected with pests or diseases, remove them immediately and destroy them. Do not compost them, as this can spread the infestation.
- Practice good sanitation:Clean your gardening tools and equipment regularly to prevent the spread of pests and diseases.
- Use organic pest control methods:There are a variety of organic pest control methods that can be used to deter pests and diseases. For example, you can use neem oil, insecticidal soap, or diatomaceous earth.
Treating Infected Bulbs
If you find that your bulbs are infected with pests or diseases, there are a few things you can do to treat them:
- Remove infected bulbs:The first step is to remove any infected bulbs from the ground.
- Treat with fungicide:You can treat the soil with a fungicide to help control fungal diseases.
- Use insecticidal soap:You can use insecticidal soap to control pests such as bulb flies.
- Protect healthy bulbs:Once you have treated the infected bulbs, you can take steps to protect the healthy ones from further damage. For example, you can use a protective netting to prevent bulb flies from laying eggs.
Caring for Bulbs After Blooming
Once your spring-flowering bulbs have finished blooming, it’s important to provide them with the right care to ensure they thrive and return for many years to come. This crucial post-bloom care helps bulbs replenish their energy reserves, allowing them to produce even more vibrant blooms in the following season.
Caring for spring-flowering bulbs planted in fall is relatively straightforward, involving proper planting depth, well-drained soil, and consistent watering. To ensure a vibrant display of color come spring, consider choosing from a diverse selection of bulbs, such as those featured in our Top 10 Spring Flowering Bulbs To Plant In Fall guide.
Once established, these bulbs will require minimal maintenance, providing a beautiful burst of color each year.
Allowing Foliage to Die Back Naturally
After your bulbs have finished blooming, resist the urge to cut back the foliage immediately. The leaves are essential for the bulbs to photosynthesize and store energy for the next growing season. Allowing the foliage to die back naturally ensures that the bulbs receive the necessary nutrients for optimal growth and development.
Cutting Back the Foliage, How To Care For Spring Flowering Bulbs Planted In Fall
Once the foliage has completely turned brown and withered, it is safe to cut it back. This can be done with a sharp pair of scissors or pruning shears. Cut the foliage close to the ground, leaving a small stub to prevent soil erosion.
Dividing Bulbs
After several years, your bulbs may become overcrowded, leading to smaller blooms and a decline in overall vigor. Dividing bulbs every few years helps rejuvenate them, promoting healthy growth and more abundant flowering.
- Identify the Best Time to Divide:The ideal time to divide bulbs is during the dormant period, typically after the foliage has died back and before new growth emerges in the fall.
- Digging Up the Bulbs:Carefully dig up the bulbs, taking care not to damage them.
- Separating the Bulbs:Gently separate the bulbs, making sure each division has at least one healthy bulb and some roots.
- Replanting the Bulbs:Replant the divided bulbs in a well-prepared bed, ensuring they are planted at the appropriate depth.
Wrap-Up

By following these steps, you can ensure your spring-flowering bulbs thrive, producing a breathtaking display of colors and fragrances that will brighten your garden. Remember, patience and consistent care are key to achieving a successful bloom. From choosing the right bulbs to protecting them from pests, every step contributes to a vibrant and flourishing garden that will reward you with a breathtaking display of beauty each spring.
Clarifying Questions
What are the best spring-flowering bulbs for beginners?
Tulips, daffodils, and hyacinths are excellent choices for beginners due to their ease of care and vibrant blooms.
How often should I water my bulbs after planting?
Water deeply and consistently, especially during the first few weeks after planting, ensuring the soil remains moist but not soggy.
When should I fertilize my bulbs?
Fertilize your bulbs in the spring, once new growth emerges, using a balanced fertilizer specifically designed for bulbs.
Can I leave the bulb foliage to die back naturally after blooming?
Yes, allowing the foliage to die back naturally allows the bulb to store energy for the next year’s bloom.
